Edit Employee
The Edit Employee screen provides the ability to modify an existing employee's information and grant specific application-related access once the employee has completed the registration process.
Note:
- The Employee permissions are split into two categories - general permissions for viewing, editing, creating, and deleting, and permissions specific to each tab and its sections. Refer to permissions for more details.
- To view the employee grid, employees must hold the "Employee - Allow access" permission. Editing requires "Employee - Edit access" permission.
- Access to view or edit specific employee sections or tabs depends upon having the relevant permission. For example, an employee with "Employee - Demographics - Self" permission can modify their own records, while the "Others" permission enables editing of other employees' records. Similarly, permissions like "Employee - SSN/SIN/NIN - Self" grant access to editing personal records, while the "Others" permission allows editing of others' records.
- By default, the logged-in employee with "employee role" cannot access their own record. Any employee who have access can view the "Edit Employee" screen via the Profile icon. Clicking on their name below the Profile icon directs them to the "Edit Employee" screen. However, making changes to any fields across the employee screen tabs or sections requires appropriate access and edit permissions.
General
Personal
Pay
Clock
Attachments
Change Log
How to Inactivate an Employee
Click on Employees.
Click on the First Name of the employee.

The screen will take you to the edit employee screen. You will see the following tabs.

Please also refer to Add Employee for more details.
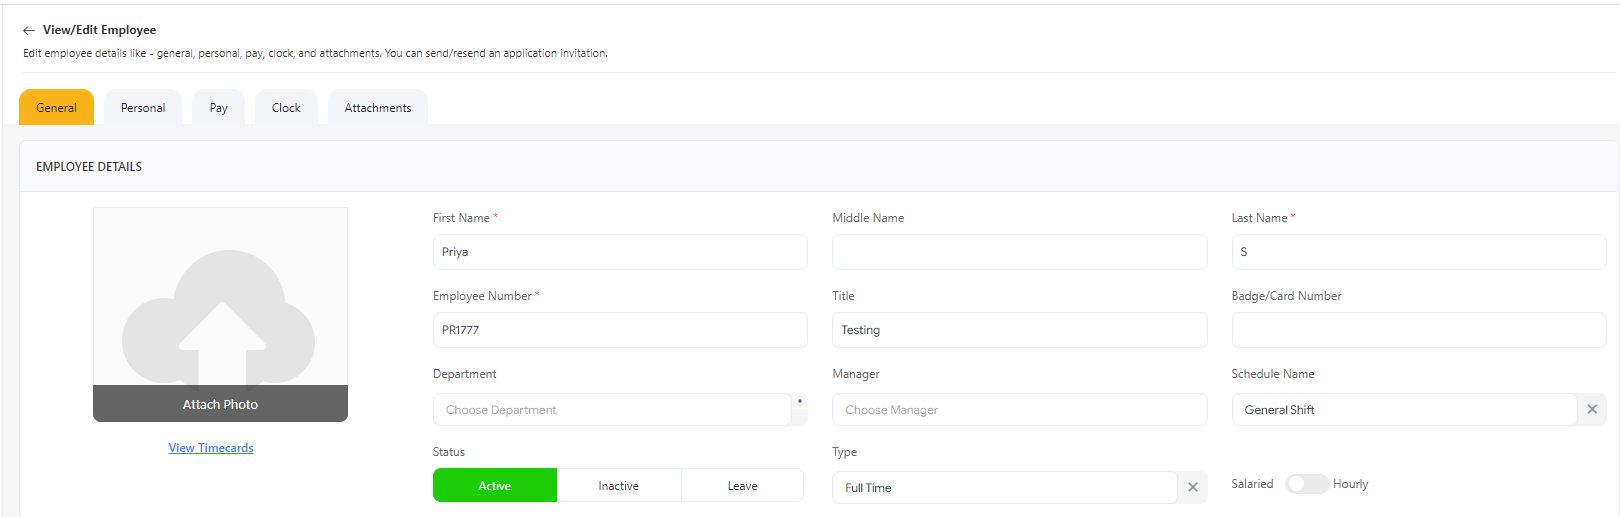
General tab
- Employee Details - You can update any of the following employee's general details:
Required fields are:
- First Name (Required), Last Name (Required)
- Employee Number (Required)
- Time Zone (Required) - Select the employee's time zone. By default, it will display the time zone selected on the Localization settings. Note that you can change the time zone settings for each employee and save.
The remaining fields below employee details are optional.
- Middle Name - Enter/update the middle name of the employee, if any.
- Title - Enter/update the designation.
- Badge/Card Number - Enter/update the badge/card number.
- Department - Select/update the department name. The departments are added in the Department screen.
- Manager - Select/update the manager. The dropdown will populate all the employees. Once you assign a manager and save. The assigned manager will start seeing this employee on their View Employee screen.
- To view all the employees in an organization, one should have View All Employees permission. Refer to the topic - Viewing All Employees.
- If someone wants to see this employee, then they should have the "View Employee List From" field set to the assigned manager. The related topic is Setting View Employee List From.
- Note that assigning a manager enables the Manager Approval checkbox on the Timecard Settings section.
- Schedule Name - Select/update the schedule. The dropdown will populate all the schedules. The schedules are added on the New Schedule Template screen. This schedule will be the employee's default schedule.
Note: If an employee does not have a schedule template assigned to them, the clock in/out button on the Home screen will be hidden.
- Status - The options are Active, Inactive, and Leave
- When you are changing the status from Inactive to Active, ensure that there is enough license. The license is consumed when you change the status to Active. Refer to the topic - How PreciseTime Enforces Employee Count License Restrictions.
- To deactivate an employee, click on the "Inactive" option. Note that making a user Inactive will increase the License count. Refer to the topic - Steps to Inactivate an Employee.
- The status "Leave" appears for the employees who are on leave. The status leave will not have any effect on the License count.
- Type - The options are Full Time and Part Time. Select one option.
- Salaried / Hourly - Select/update the rate type - salaried or hourly option. This is the employee's default setting. Also, refer to the Rate Type in the Pay tab section.
Note - Any change made on the salaried or hourly section of the Pay tab will not reflect on the General tab. The administrator should manually update the rate type on the General tab whenever there is an update on the employee's pay.
- Exempt / Non-Exempt - Toggle the switch to select the exempt or non-exempt option.
- Site - Select/update the site. The sites are added in the Sites screen. Refer to the Site Restriction on the role screen.
Note: The employee’s assigned site does not impact geo-fences, and all sites with Geo Enabled are used for all employees.
Note: The employees with Employee - SSN/SIN/NIN - "Self" permission can edit their records and "Others" permission can edit other's records. An Employee with an “employee role” can access the “Edit Employee” page from the Profile icon.
- Start Date, Termination Date, and Next Review - The start date is the date of joining, the termination date is the last working day in the organization, and the next review date is the date when employee performance is assessed.
- Payroll Rules - Select the payroll rule. The Payroll Rules feature allows you to define and configure the payroll rules for calculating payroll and overtime. Access View Payroll Rules topic for more details.
- Attach Photo - You can update the display picture.
Note: While changing the picture, the Attach button on the popup screen would be the Change button as you are changing the display picture. The picture details will also be available on the Attachment tab. If you delete the profile picture from the attachment tab, the picture gets deleted from the general tab.
Links
- View Timecards - The "View Timecards" link is displayed on the "Edit Employee" screen.
- When accessing your own employee information on the Edit Employee screen, clicking on this link will direct you to the "My Timecards" screen.
- However, if you are accessing another employee's information on the Edit Employee screen, clicking on this link will lead you to the "View Timecards" screen.
Note: The View Timecards link will not appear on the Add Employee screen.
Please read the Add Employee > Employee Details section for details.
- Contact
- Office Phone, Cell Phone (Optional) - Update the phone numbers
- Work Email (Required) - You can also update the email ID.
Note - An invitation for registration will be sent again to the employee.
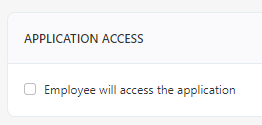
- Application Access
If you are editing an "active (status)" employee, you will see the following fields:
Before Registration
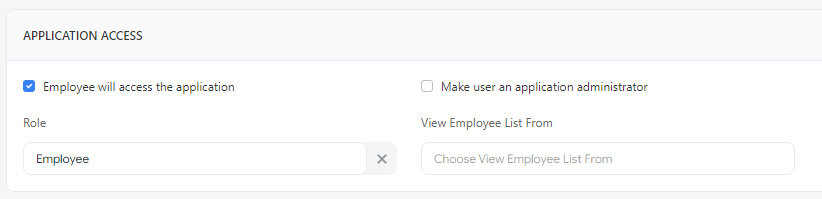
- Employee will access the application - By default, this checkbox will be enabled and checked. A valid work email ID is a must to save an employee info who has the "employee will access the application" checkbox checked. Note that unchecking the checkbox will hide all the fields that appear in the application access section.
- Make user an application administrator - Check this checkbox to make the employee an application administrator.
Note - The first employee who logs in to this application will have this checkbox checked by default. The App Administrator can change their role. They have permission to check and uncheck the “App Admin” flag for others. An employee without the app admin permission is unable to modify the checkbox for others.
Note - An employee that has the Application Administrator attribute turned on can view all employees.
- Role - This will display the role selected by the administrator before sending the invitation. You can change the role. The "Employee" is the default role. A new role is added on the Add Role screen. By default, the dropdown will show administrator, manager, and employee roles.
- View Employee List From - Select the employee from the list. It allows configuring an employee to view the employee hierarchy from another's perspective. This employee should have "Employee - View Tree from Employee" permission to use this feature.
After Registration

- User Name - The field will appear only if the employee has completed the registration. The username is created by the employee during registration.
- Status - Displays "Pending" on sending invitation/till the employee registration is pending and "Accepted" once the registration is completed. The Reset Password link allows you to reset the password.
Note: You can disable Employee will access the application checkbox too.
The related topic is registration and login.
- Timecard Settings (All Optional)
Weekly Time Card Requires
- Employee Approval - When you are editing an employee, you can uncheck or check this checkbox. If this checkbox is checked, it means that the employee should approve/submit their timecards. Refer to the topic Submit Timecard/Approve Timecard.
Note:
- The employee approval checkbox will be disabled if you uncheck the "Employee will access the application" checkbox. Also, when adding a new employee, this checkbox is enabled and checked by default.
- If only Employee Approval checkbox is only checked, then the manager cannot approve.
- Manager Approval - When you are editing an employee, you can uncheck or check this checkbox. Generally, this checkbox is disabled by default and is enabled & checked only when you assign a manager to an employee. If this checkbox is checked, it means the employee's timecard requires the manager's approval. The assigned manager would see the Approve button on the employee's timecard on the View Timecard screen. Refer to the topic Approve Timecards.
Note:
- If only manager approval is checked, then only a manager can approve the timecard.
- When the "Manager approval" option is checked, the timecard can be approved by an employee who is an "Application Administrator" and has the role of "Administrator" or "Manager" in the application.
- Required Only if Overtime - Required Only if Overtime (OT) enables only if the manager approval checkbox is checked. If this checkbox is checked, it means the employee's timecard requires the manager's approval if they have overtime.
Note:
- If there is no OT, the employee can approve their timecard, but the manager can not approve it.
- If there is an OT, the employee can submit the timecard, and the manager will approve the employee’s timecard.
- Never Export Payroll - This setting means to exclude this employee when performing an export of timecard data to their payroll system. Refer to the topic Export Payroll.

Personal
The personal tab captures employees' personal details. All the fields are optional and can be updated.
- Contact
- Home Phone and Personal Email
- Address
Note: For the timecard to record geofence data, we recommend configuring both the "Capture Punch Geolocation - Web" and "Capture Punch Geolocation- Mobile" settings, specifying whether it's required or optional, and ensuring that permission to add location data to each punch is granted.
- Emergency Contact Information
- Emergency Contact and Note
- Demographics
- Date of Birth, Gender, Race, and Marital Status.
The related permissions are Employee - Personal, Employee - Demographics - Others, and Employee - Demographics - Self.
Note: The employees with Employee - Demographics - "Self" permission can edit their records and "Others" permission can edit other's records. An Employee with an “employee role” can access the “Edit Employee” page from the Profile icon.
Please read the Add Employee > Personal section for details.
Pay
The pay tab captures the current and future pay rates that include pay class (hourly/salaried), pay rates, and effective date. You can update these details as and when there is a pay update or expected update.
- Add/Edit Pay Rate

- Effective Rate - Select the date from the calendar. It is the date from when the salary change happened or will happen.
- Rate - Enter the rate.
- Rate Type - The options are hourly and salaried. By default, one of the rate types will be selected. The selection depends on the rate type selected on the General tab. The rate type can capture the employee's future pay rate changes, too. You can add a new rate type with new rates and the effective date. Any change made in the rate type on the pay tab will not alter the rate type selected on the General tab.
Note- Once the effective date starts, the administrator should manually update the rate type on the General tab.
- Rate History
- The rate history captures all rates set up for this employee, along with their effective dates.
Note - Rates can be edited or deleted prior to being used in the pay cycle. If it is used, the rate will be locked and uneditable.
- Edit - The rate type and rate can be edited in the "Rate History" table itself.
- Delete - You can delete the rates from the rate history table.

Clock
The clock tab is to assign clocks to an employee. You can assign multiple clocks to a single employee.
- Clock User Details
- Clock User ID - Update the clock user ID. In case the user ID is already in use, an error message will be displayed upon editing and saving, indicating that the clock user ID is already in use.
Note
- This field is not mandatory for an employee who only uses the web or mobile clock in/out feature (on the home screen).
- This field only accepts numeric values with no leading zeros.
- The clock user ID must be unique.
- Display Name - It is the name entered on the clock. Once updated, the clock will display the updated name.
- Privilege - The options are normal user, registrar, and super admin.
Note: These are internal Clock Roles. Admin has full access to the clock. Registrar is a subset of permissions on the clock, primarily for registering users’ fingerprints to the clock.
- Passcode - It is the passcode entered by the employee. The passcode remains hidden by default. Use the eye icon to view the passcode. You can update the passcode in the application or on the clock. To update on the clock, you may need your company's administrator's help.

Note: With WaspTime and the BC100, RF200, HD300 or B1100/B2000 clocks, if an employee chooses to type on the keypad rather than just swiping their badge, the clock expects them to enter their badge number followed by their passcode. With PreciseTime and the new clocks, the employees are created on the clock with a UserID that matches their Employee Number in the program, and the Badge Number is separate. When swiping their badge, it will read the Badge Number, but if they choose to manually type on the keypad, it will expect them to enter their UserID/Employee Number followed by their passcode. If their Badge Number does not match their Employee Number and they try to type the Badge Number, the clock will respond "Invalid ID".
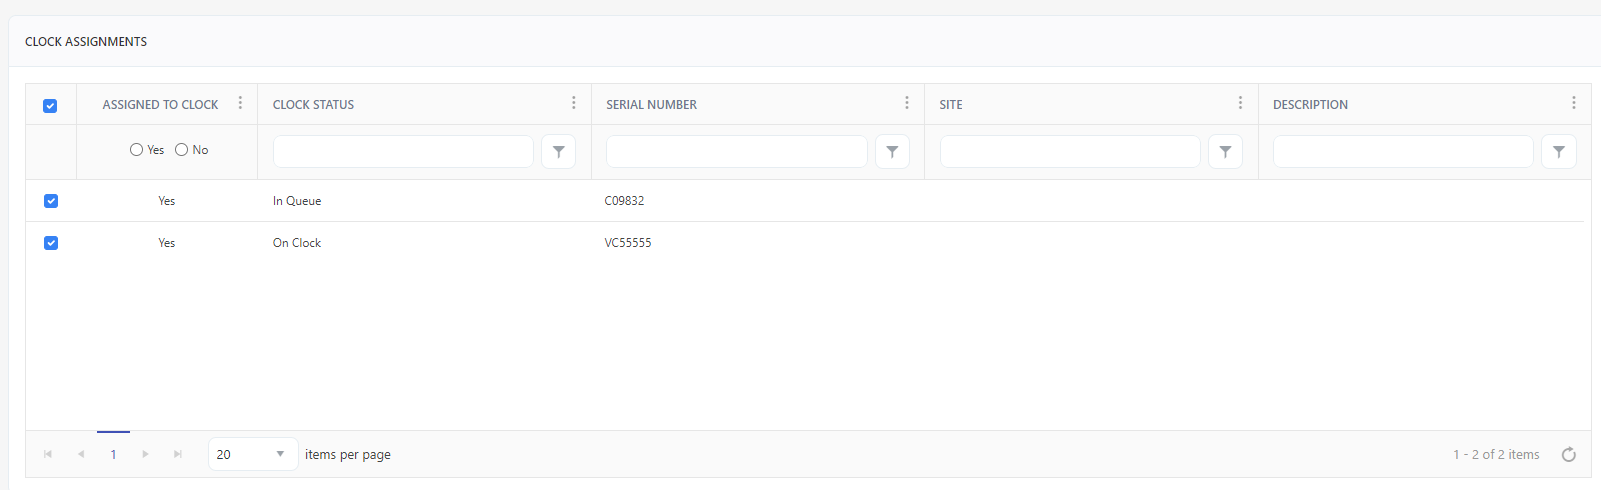
- Clock Assignments
- Assigned to clock - Display Yes or No. "Yes" means the clock is assigned to the employee and "No" means the clock is not assigned to the employee.
- Clock Status - Clock Status is to show if a request to add an employee to a clock has been processed or is still pending. The status would be "In Queue" or "On Clock".
- Serial Number - Display the clock's serial number.
- Site - Display the site where the clock is installed.
- Description - Display the description that you added while adding a clock.
- Filter - Each column on the table has a sorting and a search option. You will see a search text box in each column where you can type and search.
Assign / Unassign Clocks
- To assign a clock to an employee, check the checkbox to select the clock and save.
- To unassign a clock from an employee, uncheck the checkbox and save.
Note - The employee is not immediately "assigned to" or "unassigned from" a clock. It is assigned/unassigned only when you click on the save button. Also, note that it is possible to assign a clock to an employee who does not have a user record and who may not actually log into PreciseTime.
- Fingerprints - Display the fingerprints recorded for the assigned clocks. When you are editing an employee and assuming that the fingerprints are already taken, and the clock is already in sync with the application, the fingerprint details will appear on the Fingerprint table.
- Serial Number - Display the clock's serial number.
- Description - Display the description that you added while adding a clock.
- Date - Display the date on which the fingerprint was taken.
- Master - When an employee has a fingerprint registered on a clock, that fingerprint becomes the master copy. If the employee has assignments on additional clocks with fingerprint support, that master copy will be used to load the fingerprint pattern to those additional clocks. If a master fingerprint is removed and there is a copy on another clock, that fingerprint will be promoted to the master copy. If a fingerprint is no longer working on one clock but works on another clock, the bad version can be removed, and the good version will be copied over automatically. If the fingerprint is not working on any of the clocks, select all copies of that fingerprint on all clocks and remove them all at once. The fingerprint can then be registered again.
If an employee has multiple fingerprints registered, each one has a master version.
For Example - Employee 1, L-Index and R-Index, Clock A and Clock B:
- L-Index, Clock A = Master
- L-Index, Clock B = Not Master
- R-Index, Clock A = Master
- R-Index, Clock B = Not Master
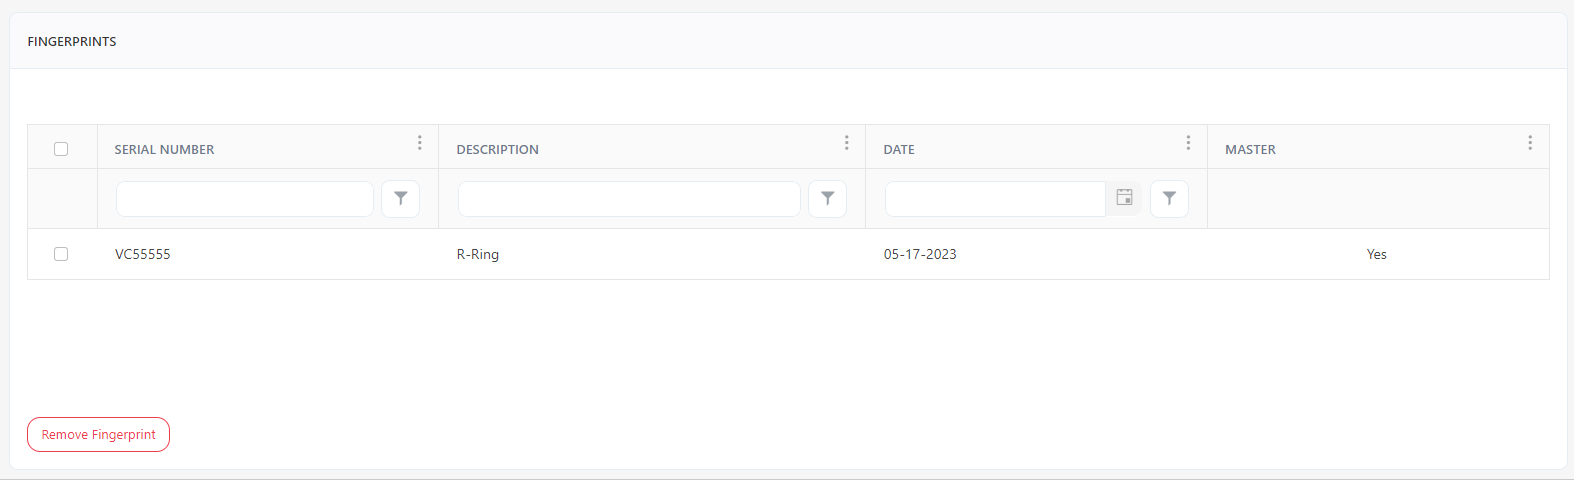
- Remove Fingerprint button - Check the fingerprint and click on the Remove Fingerprint button. If multiple fingerprints are taken for a clock and you delete the master fingerprint, then the next fingerprint will become the Master. If all are deleted, there will not be any fingerprints. The fingerprint needs to be registered again on the clock.
Attachments
The Attachment tab is to attach any employee related documents. This tab also stores the display picture attached on the General tab.
To attach files, click on the Attach Files button.
Click on the Select Files button. Browse the files.
Once the file is uploaded, click on the Attach button.
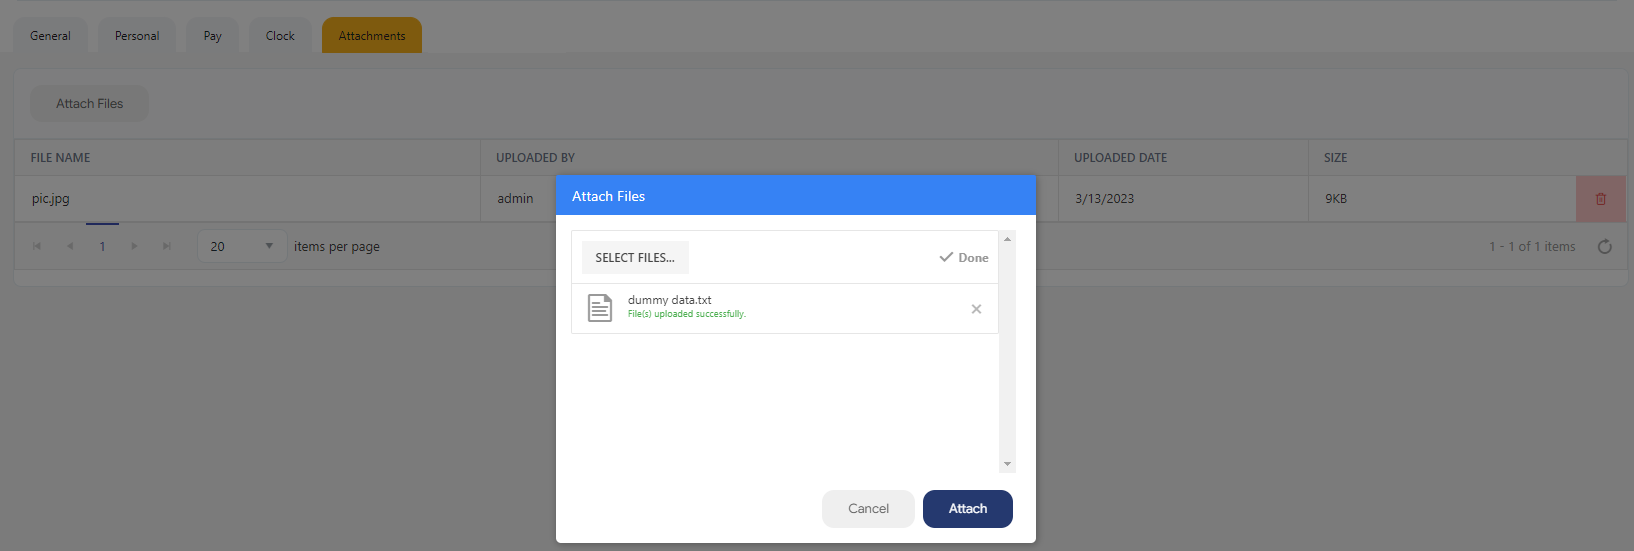
To edit the file name, double-click over the file name to enable inline editing. Edit the filename and click on the tick icon. use the trashcan icon to delete the file.

Note: If you delete the profile picture from the attachment tab, the picture gets deleted from the general tab.
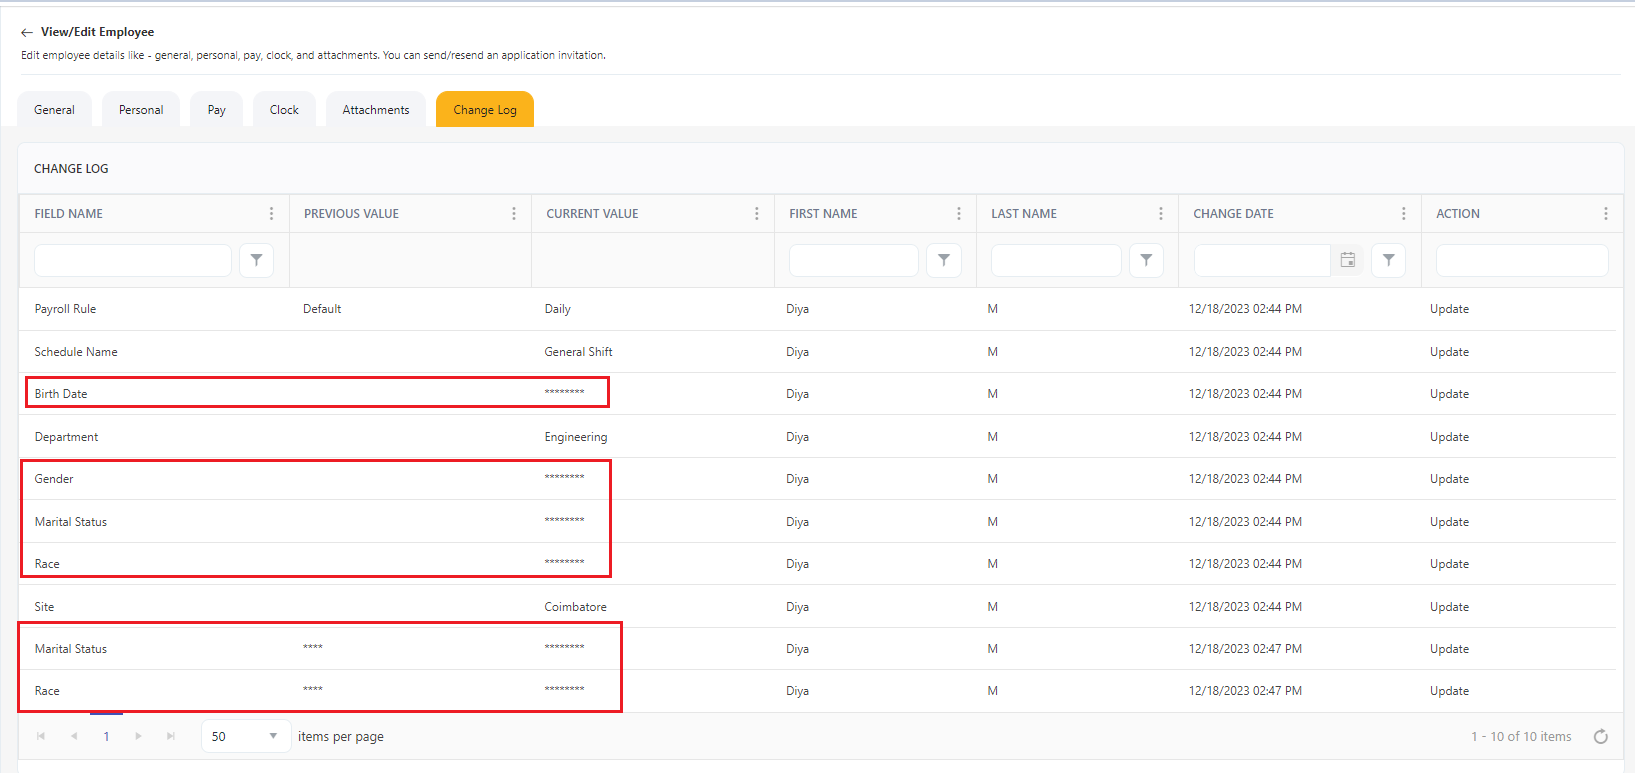
Change Log
The tab will appear only if the Change Tracking Configuration settings is enabled and the logged-in user has Employee - View Change History permission. The change log will capture the modifications made on the employee screen. It captures details such as the field, previous value, new value, the individual making the change, the timestamp of the modification, and the action performed.

If the user currently logged in lacks access to any employee permissions, any modification made in that specific section will be decrypted. For instance, if the employee doesn't have permission to view demographics, any changes made in that section will be decrypted.
Steps to Inactivate an Employee
- Click on Employees on the main menu.
- Search for an employee. Click on the first name of the employee.
The screen will navigate to the View/Edit Employee screen.
- To inactivate an employee, click on the "Inactive" status.
A popup message will appear indicating that an inactive employee can no longer access the PreciseTime - web and mobile applications.
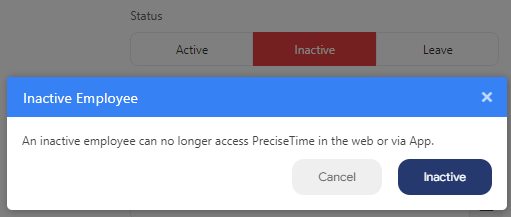
- Click on Inactive.
You will notice that inactivating an employee disables the "Employee will access the application" checkbox.
- On the View Employee screen, the user status changes from "Active" to "Inactive".
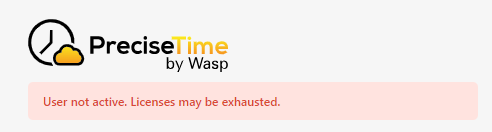
When an inactive employee tries to log in, they will get a message on the login page indicating they are inactive.
- To activate an "inactive employee", click on the "Active" status on the view/edit employee screen and save.
- Make sure to check that the "Employee will access the application" checkbox is checked. Add/update the email ID.
- Suppose the user held a "Manager" role prior to unchecking the "employee will access the application" option. Once checked, the role will display the previously set value (i.e. Manager).
- The user will get an email using which they can register and try to log in.
- If there is enough license, then the user will be able to log in after the registration.
- If there is an insufficient number of licenses, users will be unable to log in. On the login screen, they will see a message that the license is exhausted.