Sites
The Sites screen allows you to add sites to the system.
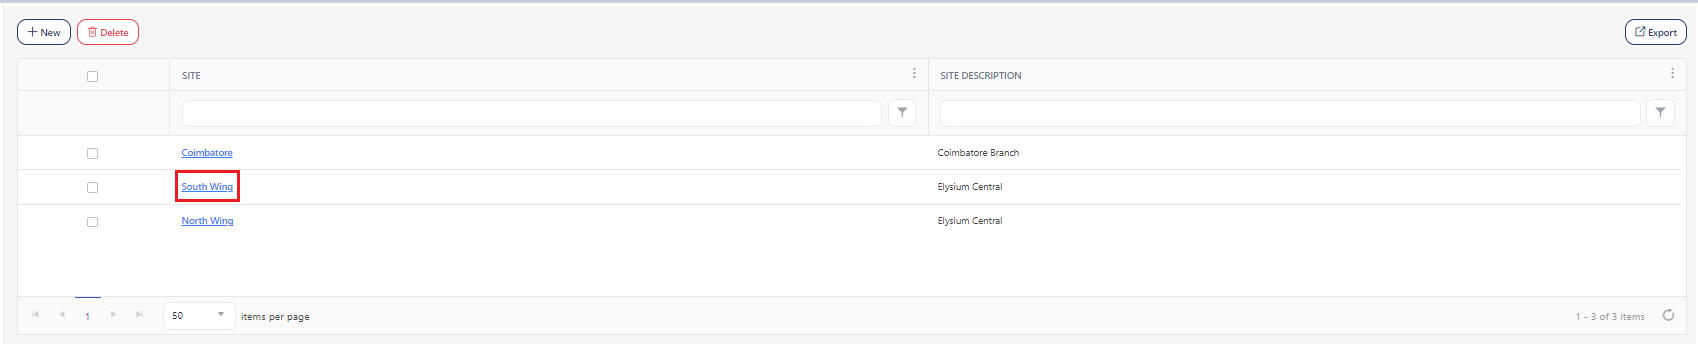
View Sites
Add Site
Geofence
Edit Site
Delete Sites
Export
Filter
Note: You should have site permissions to allow access, add, edit, and delete. Refer to permission for more details.
View Sites
Click Sites below Setup.

The site screen has the following functionalities:
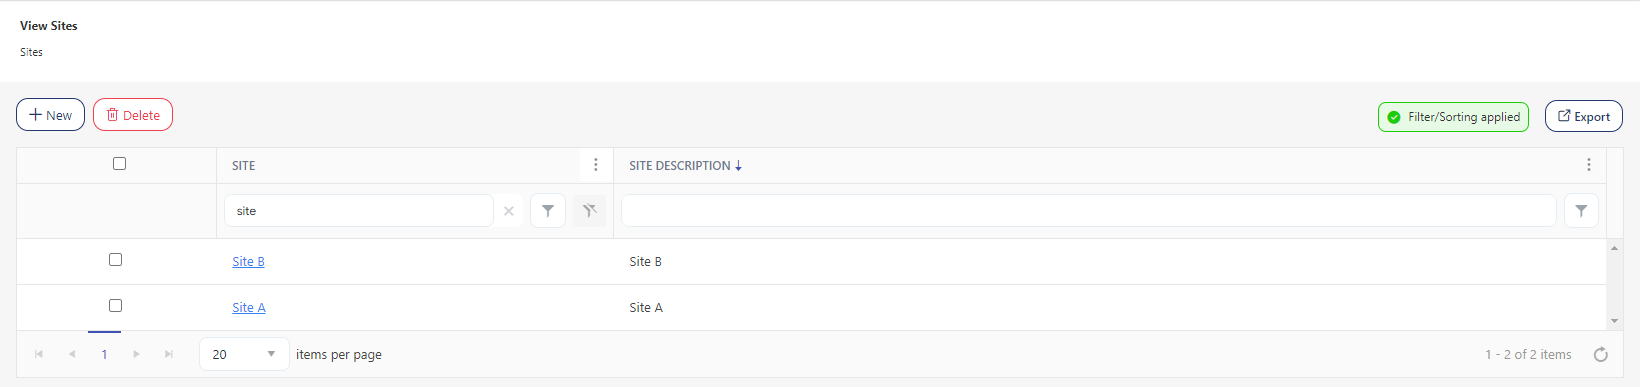
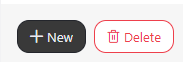
- New and Delete button - Allows you to add and delete sites.
- Edit - The site name is a hyperlink that will navigate to the View/Edit Site screen.
- Export - You can also export the list of sites.
- Filter/ Sorting Applied - It displays the filter text and the column where sorting is applied.
Add Site
- Click Sites below Setup.
- Click New.
- Add the following details on the New Site screen:
- Enter the site name (required).
- Enter a site description (optional).
- Enter notes (optional).
- Enter the address - Address Line 1, Address Line 2, City, State / Province, Zip / Postal Code, Country, and Mail Stop.
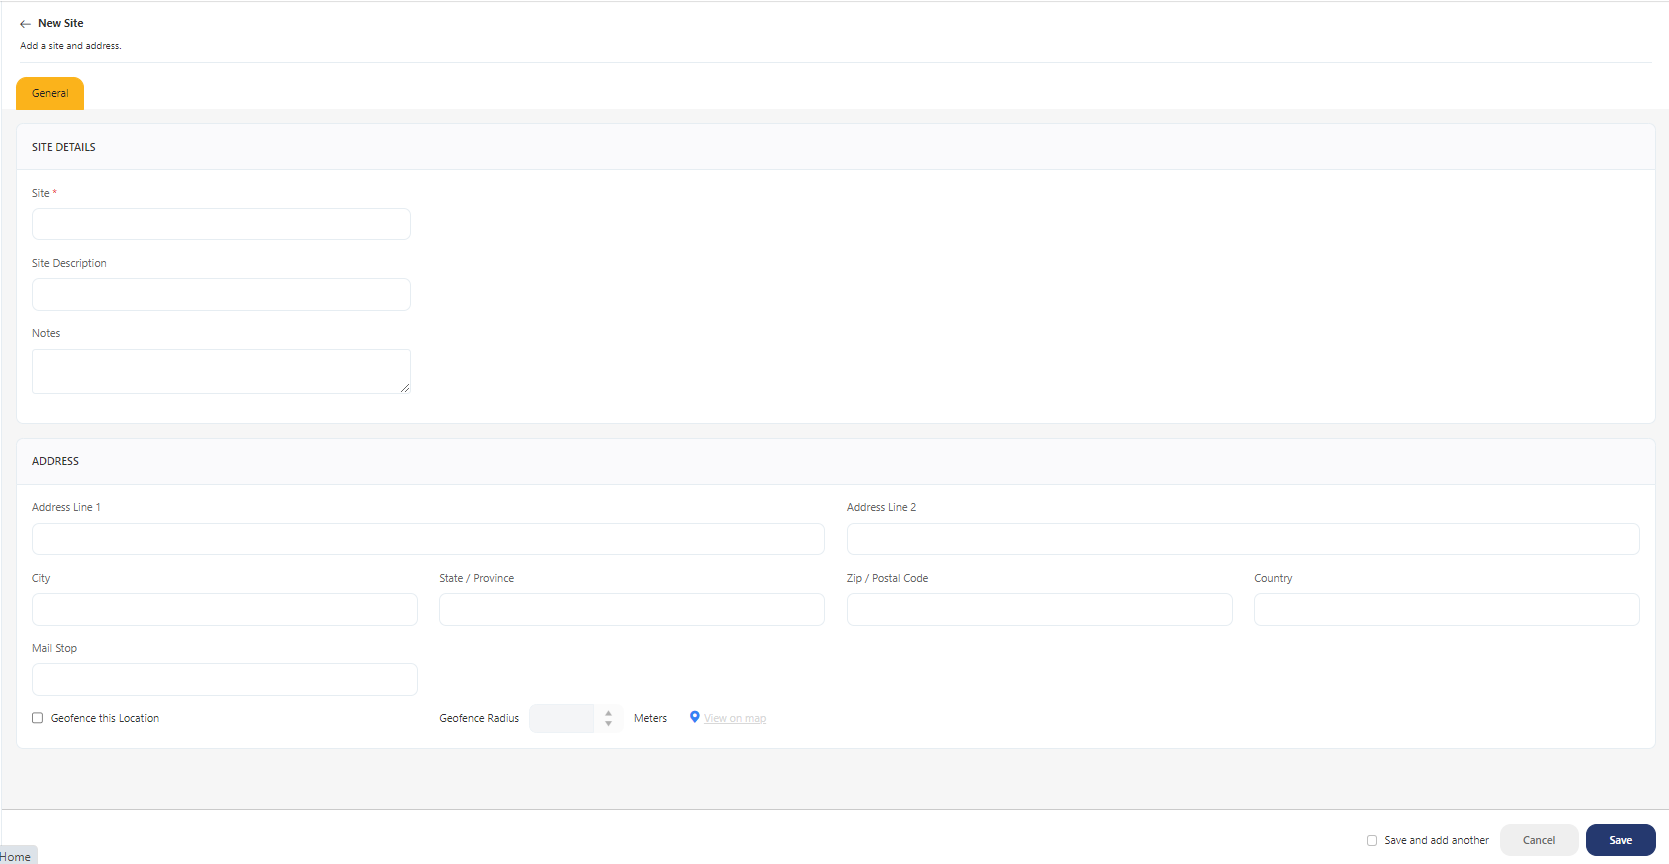
- Geofence this Location
Note:
- The employee’s assigned site does not impact geo-fences and all sites with Geo Enabled are used for all employees.
- For the timecard to record geofence data, we recommend configuring both the "Capture Punch Geolocation - Web" and "Capture Punch Geolocation- Mobile" settings, specifying whether it's required or optional, and ensuring that permission to add location data to each punch is granted.
To enable geofence:
- Check the checkbox to add a geofence to the site. Selecting the checkbox will enable the Geofence Radius field.

- Once the 'Geofence this Location' checkbox is selected, enter the geofence radius. Note: The geofence radius ranges from a minimum of 30 meters to a maximum of 80000m (49.72 miles), with a default radius of 50 meters.

- Click on the View on map link to view the geofence area.
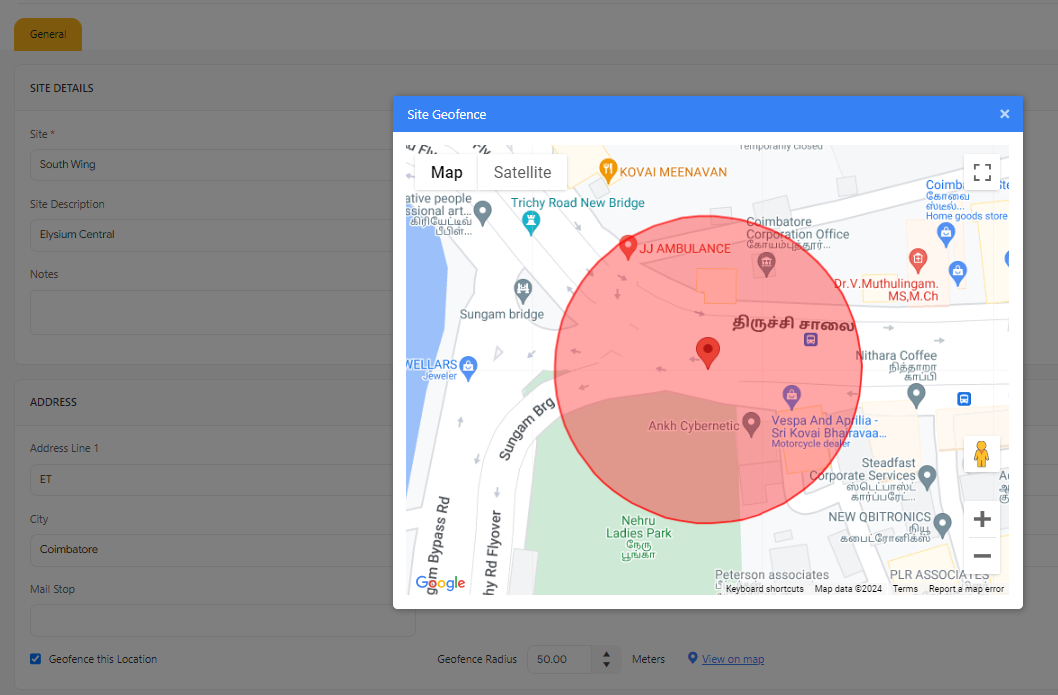
Warning: Choosing too small a radius may result in punches not being recognized as 'In the zone.' Also, keep in mind that near large buildings, GPS signals can drift more than usual. Wasp Barcode cannot be responsible for GPS hardware accuracy.
- Click on Save. To cancel the changes, click Cancel.
- Save and add another - if you want to add more, check this checkbox before saving. The New screen appears on saving.

- A success message appears on saving.
Edit Site
- Click on the site name.
The screen navigates to the View/Edit Site screen.
- Edit or update the required fields.

- Click Save. To cancel the changes, click Cancel.
A success message appears on saving.
Delete Sites
- Select the site by checking the checkbox.
- Click on Delete.
- Click on the Delete button again on the confirmation message.
Note: You cannot delete a site if it is associated with an employee or a clock.
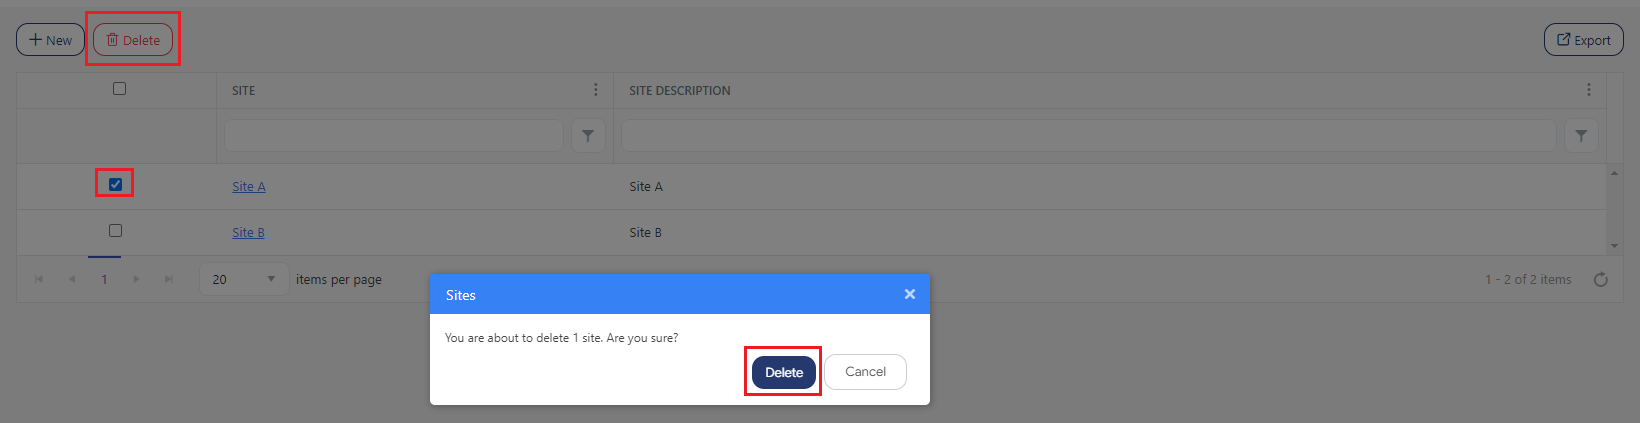
A success message appears on deleting.
Export
Click on the Export button to download the list of sites.

Filter
Each column on the view screen has a sorting and a search option. You will see a search text box in each column where you can type and search. In some cases, the column will only have a sorting option. The search box in each column in an application provides users with a more precise and granular way of filtering data, making it easier to navigate and find the information they need. Enter the text/value that you want to search. You can also enter multiple search terms across different columns. The application will apply all search criteria to filter the data, showing the rows (on the top) that match all the selected criteria.
This approach enables you to filter data based on multiple criteria simultaneously, making it easier to find the specific information you are looking for.
- You can use the filter funnel icon to select - Starts with, Is equal to, Is not equal to, Contains, Does not contain, and Ends with.

- Filter/Sorting Applied - This feature is an indicator in the application to show you that sorting or a filter/set of filters has been applied to a list. This indicator can help users keep track of the filters that are currently in use and understand which items are being displayed because of those filters.
